How do I create a customer/vendor/supplier?
details,To create contacts in Metro ERP Contacts Modules, follow these steps:
1) Go to the "Contacts" module by clicking on its icon in the main dashboard or using the application menu.

2) Inside the contacts module, click the CREATE button. This will open a form to add a new customer record.

3) Fill in Basic Information.
- Name: Enter the name of the contact.
- Company: If applicable, select or enter the company name.
- Address: Fill in the address details such as street, city, state, zip code, and country.
- UEN: Enter the UEN number.
- GST No.: Enter the GST number.
- Phone: Enter the phone number.
-
Mobile Number: Enter the mobile number
- Email: Enter the email address.
- Website: Enter your website URL.
- Tags: Add any tags if needed for categorisation.
- SingPass ID: Enter the SingPass ID.
- Is Foreigner (Without SingPass): Check or uncheck the box.
- Image: Upload a profile picture for the contact if desired.
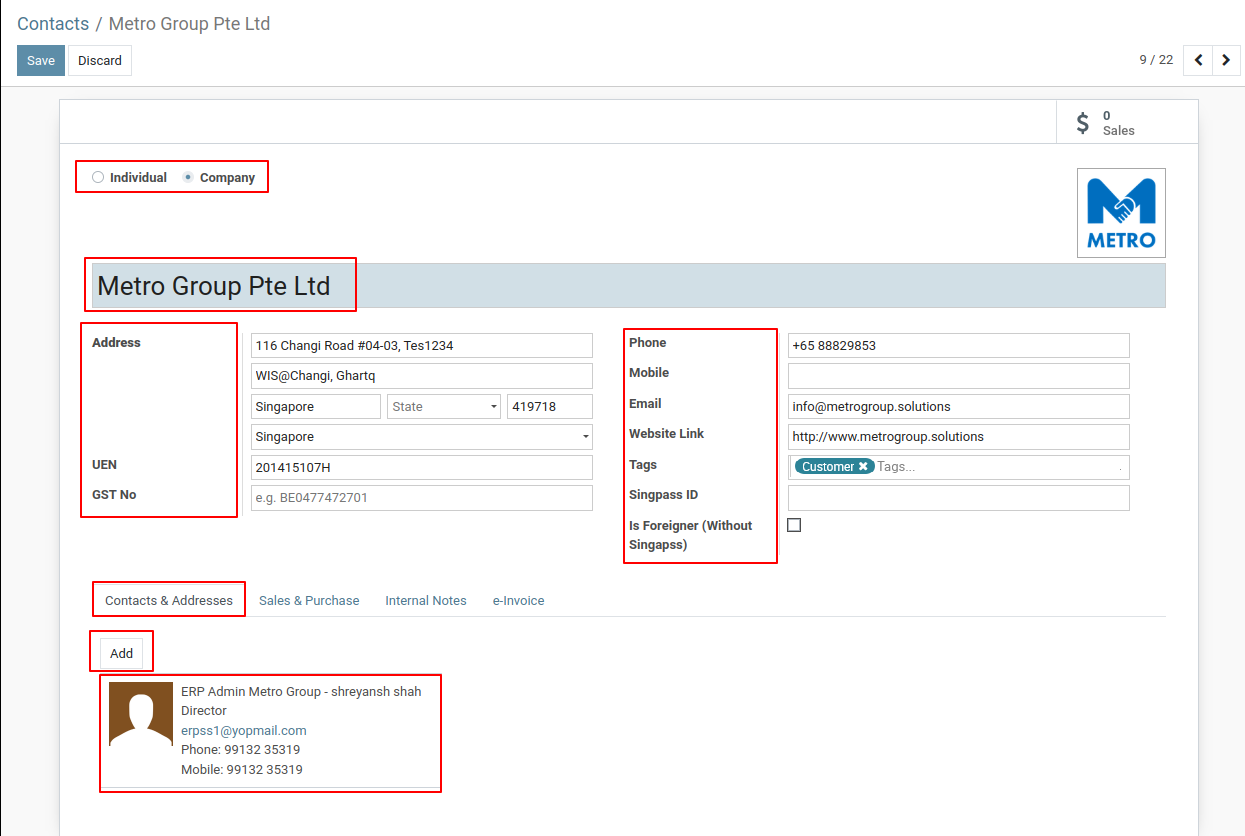
4) If you wish to add, you can include child contacts under your main contact,
Address: Click Add under the Contact & Addresses tab. Here, you can specify various addresses for the customer, including the contact address, invoice address, delivery address, and others.

5) Configure Sales and Purchase Settings
- Scroll down to the Sales & Purchases section within the contact form.
For Sales Configuration:
- Customer: Check this box if the contact is a customer.
- Salesperson: Assign a salesperson if applicable.
- Delivery Method: Choose the preferred delivery method for sales orders
- Payment Terms: Select the payment terms for sales transactions.
- Pricelist: Choose the applicable pricelist for sales.
- Sales Team: Assign a sales team if necessary.
- Fiscal Position: Select the fiscal position if required.
For Purchase Configuration:
- Payment Terms: Set the payment terms applicable for purchases from this vendor (if applicable).
- Receipt Reminder: Enable this option to send automatic email reminders for receiving payments from this vendor.
- Supplier Currency: Define the currency used by this vendor for purchases.

6) Next, in the Internal Notes tab of the contact form, consider using the Notes section to add any additional details.

Once you've entered all the information, click Save. This will create a new contact with all the details.
To get more details on how to create contact in Metro ERP Contact modules, please do contact us at support@metrogroup.solutions